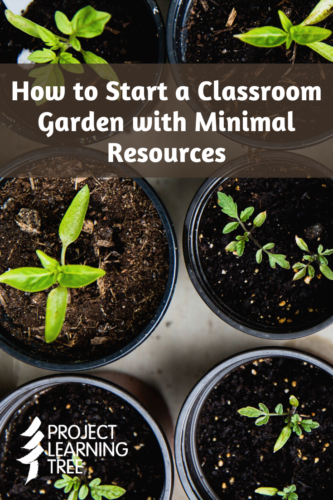
 Starting (and keeping!) a classroom garden may initially sound daunting, but it’s much easier than you think. This is true even if you don’t have many resources. All you need to start a classroom garden is:
- Containers
- Soil
- Seeds/Plants
- Light
- Water
- Fertilizer
From there, you can get creative with how you provide your garden with all of those essentials. It can be a fun way to get your students involved in a project that allows them to learn about becoming caretakers of our planet. It’s also an interdisciplinary exercise, as you can combine lessons in science with math, art, history, and more, along with the fun factor of helping your students realize their potential as amateur gardeners.
Here’s more about how you can get started with minimal resources.
Gathering Containers
If you’re working with a small space or want your students to feel ownership over your classroom garden, you’ll need to gather enough containers to make it a full class effort. There are many options for recycled materials that are suitable containers for plants.
Toilet paper rolls, old mini pots, compostable cups, yogurt cups, and milk jugs all work. Glass jars work in a pinch, but you won’t be able to create holes in the bottom of them for proper drainage. Enlist the support of students who likely already have recyclable containers around the house.
Keep the size of your containers in mind as you gather the seeds for your classroom garden. Small containers are appropriate for small plants. If the goal is to send plants home to students or replant them in a school garden, the size of your containers may not be as big of a concern.
Sterilizing Soil
If you’re using soil you and your students have found around the schoolyard or reusing soil from a separate classroom project, you may want to sterilize (or sanitize) your soil. This isn’t just cost-effective, as you’re not buying bags of soil for your classroom garden. It reduces weeds, infectious organisms, and mold that may harm your baby plants. It also makes sure there aren’t any unnecessary critters hiding in the dirt. Earthworms are the exception. Before you partake in any of the methods below, sift through the soil to remove any hiding worms. Those are great for dirt, as they help with proper drainage and keep soil healthy. You can also take this time to explore differences between soil types and investigate the role soil organisms play in building soil and decomposition with the Soil Builders activity in the Explore Your Environment: K-8 Activity Guide.
The most popular ways to sterilize are in an oven, in a microwave, or with steam. If you live in a very sunny place and have lots of soil to sterilize, you can use the natural heat of the sun, too.
Follow these links for more information on easy soil sterilization methods perfect for classroom use:
extension.oregonstate.edu/news/how-make-your-own-potting-soil
permaculturedlife.com/how-to-sterilize-potting-soil
gardeningknowhow.com/garden-how-to/soil-fertilizers/sterilizing-soil.htm
herbsathome.co/how-to-sterilize-soil
Seeds
Your plants need something to grow from as you get started, but you have quite a few options for collecting seeds that could cost you little to nothing. Post requests on Nextdoor, DonorsChoose, your local Buy Nothing group, or the “free stuff” communities on Facebook Marketplace.
You can also seek out community seed libraries, contact your local Seed Savers Exchange, or write to seed companies. Order a set of seed packs from the Alt National Park Service to kick off a lesson about native plants and pollinator-friendly gardens. The Live Monarch Educational Foundation provides free seeds for educators interested in replenishing native plant species to support healthy butterfly populations. You may be surprised by the support you find in seed communities for classroom gardens.
If you time things right, you can also lead your students on an outdoor adventure to collect their own seeds. The start of the school year in late summer or early fall is a great time to collect seeds. It also offers the chance to start the year with a team-building exercise for students who may not know each other well. This is a great opportunity to do the Have Seeds, Will Travel activity from the Explore Your Environment: K-8 Activity Guide and teach students how seeds disperse.
For early childhood educators and parents of the littlest learners ages 3-6, our Pocket Guide: Seeds to Trees helps introduce young children ages 3–6 to nature through the senses and movement. At just 4 by 6 inches, it’s small enough to fit into a pocket or backpack.
Looking for inexpensive and interactive STEM activities for your classroom? Conducting science experiments with seeds and leaves is an easy way to incorporate hands-on experiences to your curriculum. Teach your students about much more than capillary action, germination, and photosynthesis, seed science experiments teach valuable lessons in caring for living things, collecting data, and using the scientific method.
We assembled a list of hands-on plant science activities (grouped according to learners ages) that are easy to integrate into your kindergarten, elementary, or middle school classroom.
Cuttings & Vegetative Propagation
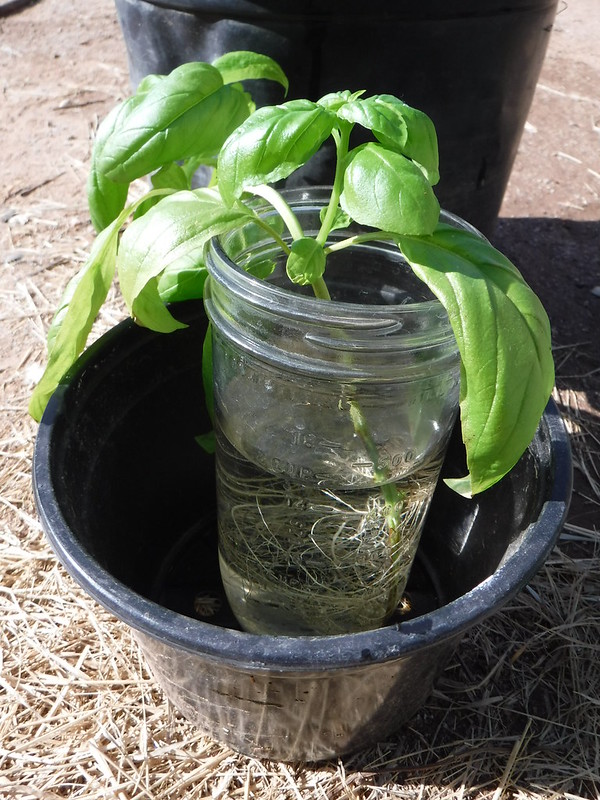
If you want to show off the power of plants, start your classroom garden by using cuttings instead of seeds. Cuttings are pieces of leaves, stems, or roots that can be planted to grow a new plant with the remaining necessary parts. If you plant a root cutting, for example, the new plant will start by growing a new stem.
Stem cuttings are the easiest way to grow new plants if you have access to healthy plants, and rhizomes, or creeping woodstalks, are best for tuber vegetables. Avoid plants that have obvious issues like wilting leaves or root rot. Plants with lots of new growth are best so that you don’t harm the healthy plant in the process.
Plants that grow well from cuttings include:
- Herbs, like lavender, basil, mint, sage, and rosemary
- Houseplants, like prayer plants and philodendron
- Tuber vegetables, like potatoes and horseradish
- Woody or fibrous plants, like tomatoes and peppers
Light
If you’re in a classroom with plentiful sunlight, your classroom’s natural light may be enough to help your plants grow. Just make sure to rotate the plants or remind your students to do so with a visual checklist. In areas with low light, plants may need to be rotated more often, but every few weeks should still be sufficient even in those situations.
If you start to notice the effects of too little sunlight, use it as a teaching opportunity. Some plants get leggy and grow upward as they attempt to find additional light. Others lose their color before they wilt. Troubleshoot with your students and help them understand why light is such an important component of a plant’s survival.
If you don’t have enough light in your classroom to keep your plants healthy and you want to supplement with some grow lights, you don’t need to purchase special lights. Shop lights are much less expensive than grow lights, and they’re full spectrum so they provide the kind of light plants need to thrive. Look for lights that are 5000 lumens. Place them 12″ above the plants and keep them on for 16 hours per day.
If you’re looking for more hands-on activities and experiments to help show students some of the concepts of photosynthesis in action, be sure to check out our article “Activities and Experiments to Explore Photosynthesis in the Classroom.”
Water
If you have a sink inside your classroom, the job of watering your classroom garden is fairly easy. Students can take turns watering, or have each student take ownership over a plant if there are enough of them. If your classroom water is hard water, you may need to think about filtered water or a natural water source depending on the plants. Too much hard water for some flowering plants can cause a calcium buildup.
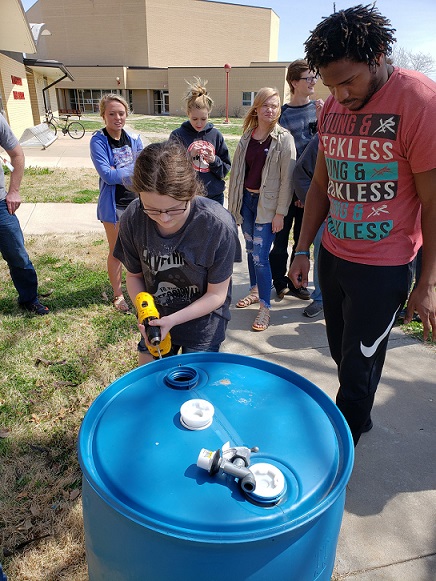
You can also consider building a rain collection system with your students. Younger students can help you with a more simple method like placing a large tub under the spout of the school’s rain gutters. Older students can experiment with more creative methods. You can divide the classroom into groups to come up with the best water gathering solutions with available materials, or have them draw out their ideas before they set forth building their “rain barrels.”
Fertilizer
Fertilizer is used to provide nutrition for growing plants, but you don’t need a trip to a specialty store or nursery to keep your classroom plants healthy and fed. You can make your own using natural, easy-to-find ingredients.
If you want the help of your students, DIY your own seed compost with food scraps like egg yolks, coffee grounds, egg shells, and old banana peels. Composting can take place in your classroom, kitchen, backyard, neighborhood, or community. Learning about compost can be a hands-on activity, and you don’t need much space to get started.
Keep in mind that your plants won’t need any fertilizer until they have their first sets of leaves. (This doesn’t include planted cuttings.) Before this step, teach students not only about the benefits of fertilizer, but the harm in too much, especially when it’s a large-scale farming operation. Fertilizer runoff, for example, can harm drinking sources and local wildlife populations. Too much of it can also cause buildup in the soil. It’s all about balance.
The Benefits of a Classroom Garden
If you reach a point where it’s no longer sustainable to keep your bounty of plants indoors, consider sending the finished products home with the students. If you have access to an expansion project, you can also consider planting your classroom offerings in a school garden outside. This is a wonderful opportunity to carry out a service-learning project focused on making positive environmental changes. Just note that you may need some additional support to manage a larger garden outside the classroom, whether that’s a regular group of student volunteers or other teachers.
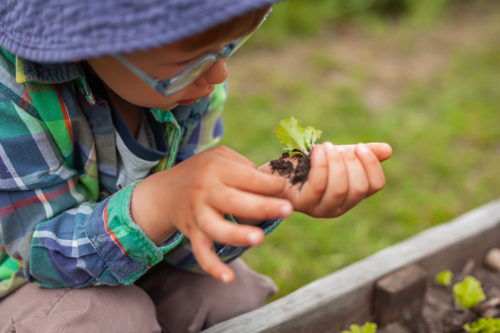
Before that happens, enjoy all of the benefits of a classroom garden:
- Teach children environmental stewardship.
- Improve student knowledge of plants, nutrition, and related concepts.
- Link the garden to interdisciplinary concepts, e.g. science and math projects.
- Improve student cooperation as a whole-group project.
- Engage students who need hands-on learning.
- Cater to a variety of learning styles.
Perhaps most importantly, you’ll create a sense of pride in students as you remind them that thanks to their efforts, they were able to help their garden grow. They created something with their hands and contributed to the natural world.
